
Start from the Dashboard
-
Sign in to ReiSearch and open the Dashboard.
-
Select Folders from the left navigation.
-
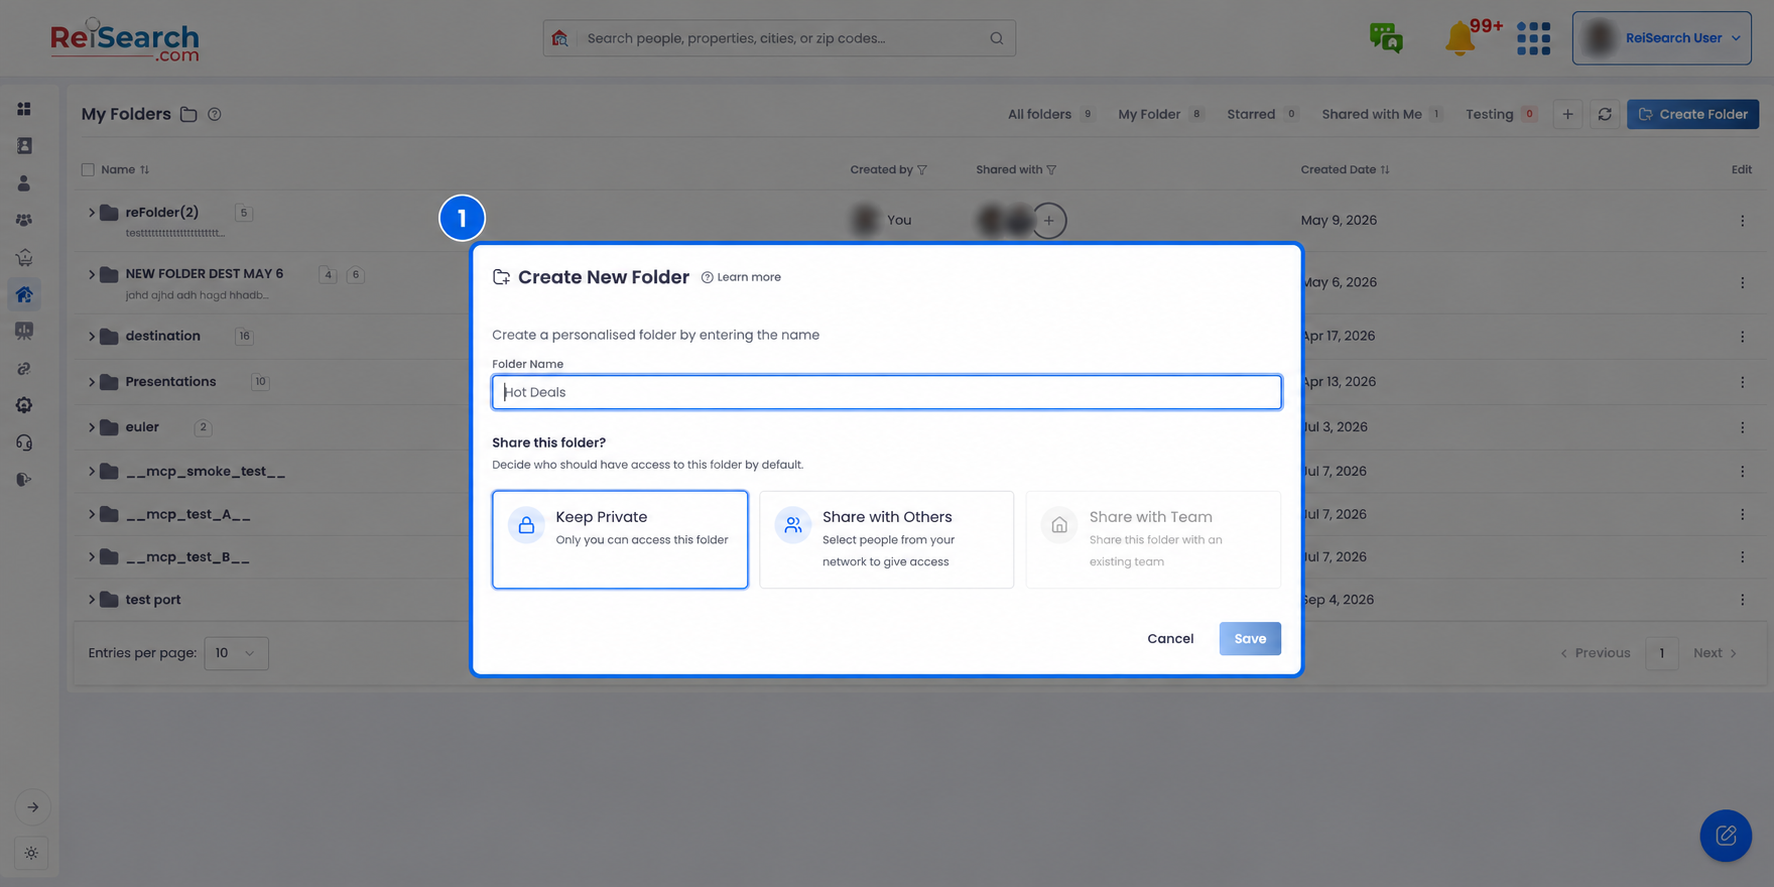
On the My Folders page, click Create Folder in the top-right. A dialog opens where you name the folder and decide who can access it.
Name your folder
-
Click Create Folder. The “Create New Folder” dialog appears.
-
Type a Folder Name — for example, “Hot Deals”. The Save button stays disabled until you’ve entered a name.
Choose who can access it
Under “Share this folder?” pick how the folder starts out. You can always change sharing later from the folder’s members menu.
| Option | What it does |
|---|---|
| Keep Private | Only you can access the folder. This is the default. |
| Share with Others | Pick people from your network to give access right away. A search box appears so you can add them before saving. |
| Share with Team | Share with an existing team. (Coming soon — this option is currently disabled.) |
-
Choose Keep Private or Share with Others.
-
If you chose Share with Others, search for people in your network and add them — their chips appear below the search box.
-
Click Save. Your folder appears in the list, ready for properties.
Plan limits: Creating folders can be limited by your plan. If you’ve reached your limit, an upgrade prompt appears instead of the create dialog.
Creating a subfolder?: Subfolders are created from inside a parent folder, so they skip the sharing step. Instead, you’ll be asked whether to Include the parent folder’s members in the new subfolder or Skip to start fresh. See Subfolders & nesting.