
All of your categories live in one place: the Manage categories dialog, where you create them, rename them, change their colors, reorder them, and delete the ones you don’t need.
Start from the Dashboard
-
Sign in to ReiSearch and open the Dashboard.
-
Select Folders from the left navigation.
-
On the My Folders page, click the + button beside the category tabs.
Open the category manager
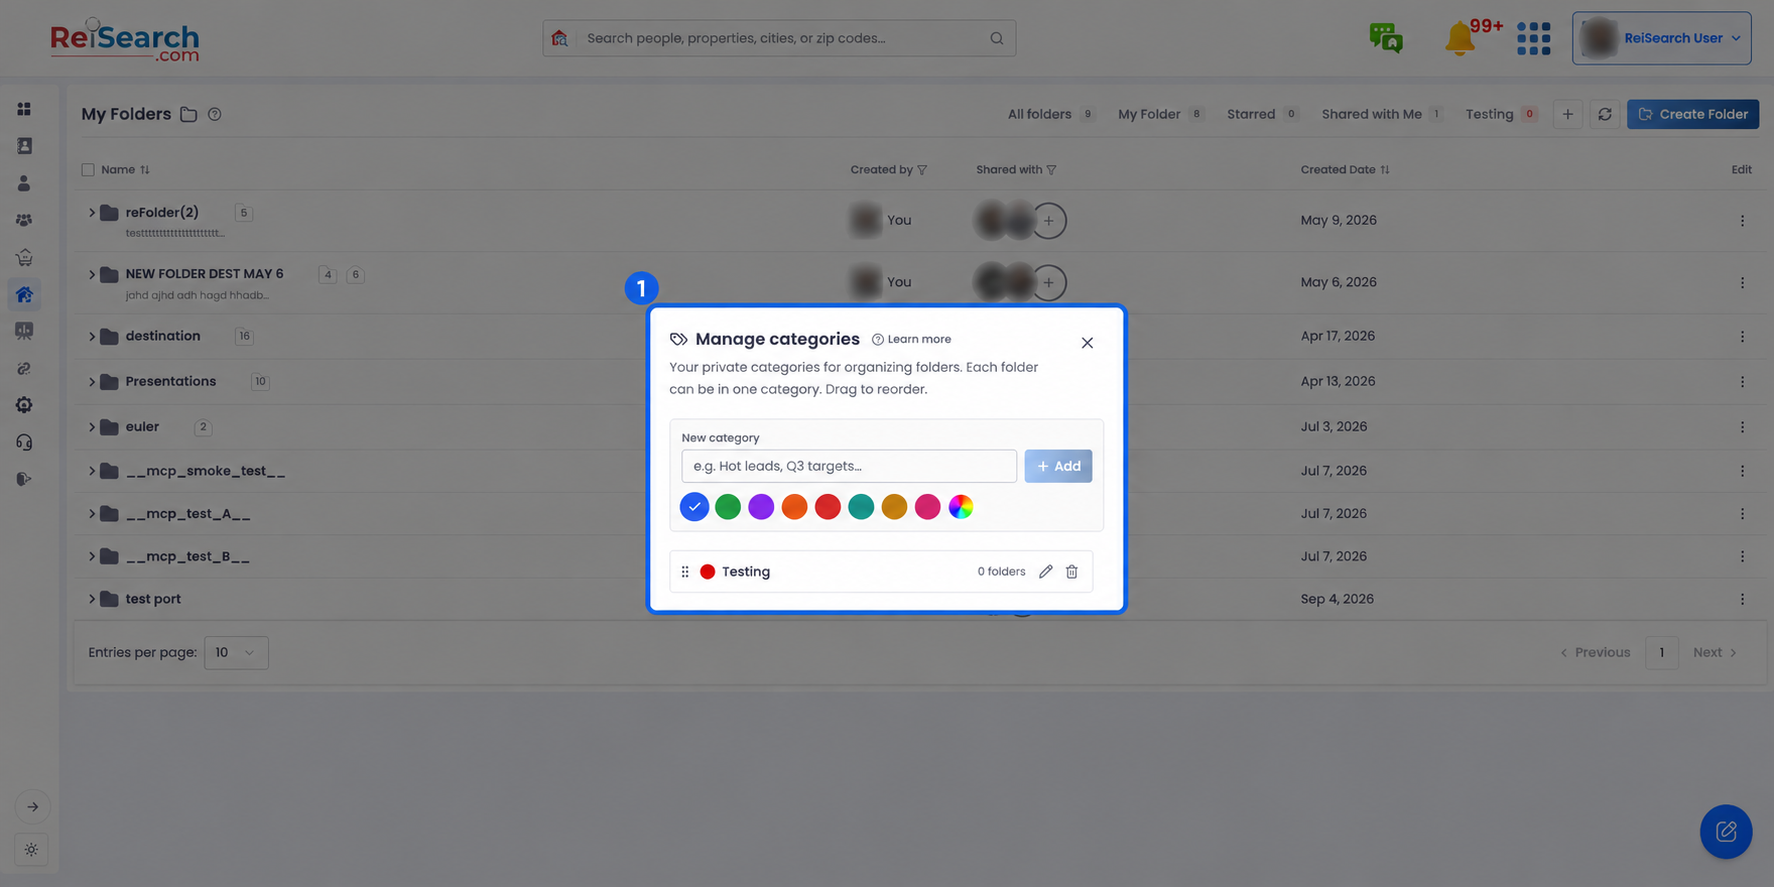
Click the + button in the Folders header to open “Manage categories.” Its description sums it up: “Your private categories for organizing folders. Each folder can be in one category. Drag to reorder.”
Create a category
-
In the “New category” section, type a name.
-
Pick a color from the swatches, or click “Custom colour” (the rainbow swatch) to choose any color.
-
Press Enter or click Add. The new category appears as a tab in the header.
Rename, recolor & reorder
- Rename — double-click a category’s name, edit it, and press Enter. (Names must be unique — a duplicate shows “A category with this name already exists.”)
- Recolor — click the colored dot on its row to open the “Category colour” picker and choose a preset or custom color.
- Reorder — drag a row by its handle (the grip on the left) to change the order of the tabs.
Delete a category
-
Hover a category row and click the trash icon.
-
Confirm in the “Delete category?” dialog.
Note: Deleting a category is safe for your folders: “Folders in this category won’t be deleted — they’ll just become uncategorised.”