
Start from the Dashboard
ReiSearch can build the same property workspace through two different starting paths. The difference is whether comparable-property analysis begins automatically.
Build the property and start comps together
- Sign in at reisearch.com/login. ReiSearch opens the Dashboard.
- Find Add & Comp Property.
- Enter the address in Add address and run comps.
- Choose the correct suggested address.
- Select Run Comps.
Navigation path: Dashboard → Add & Comp Property → Run Comps
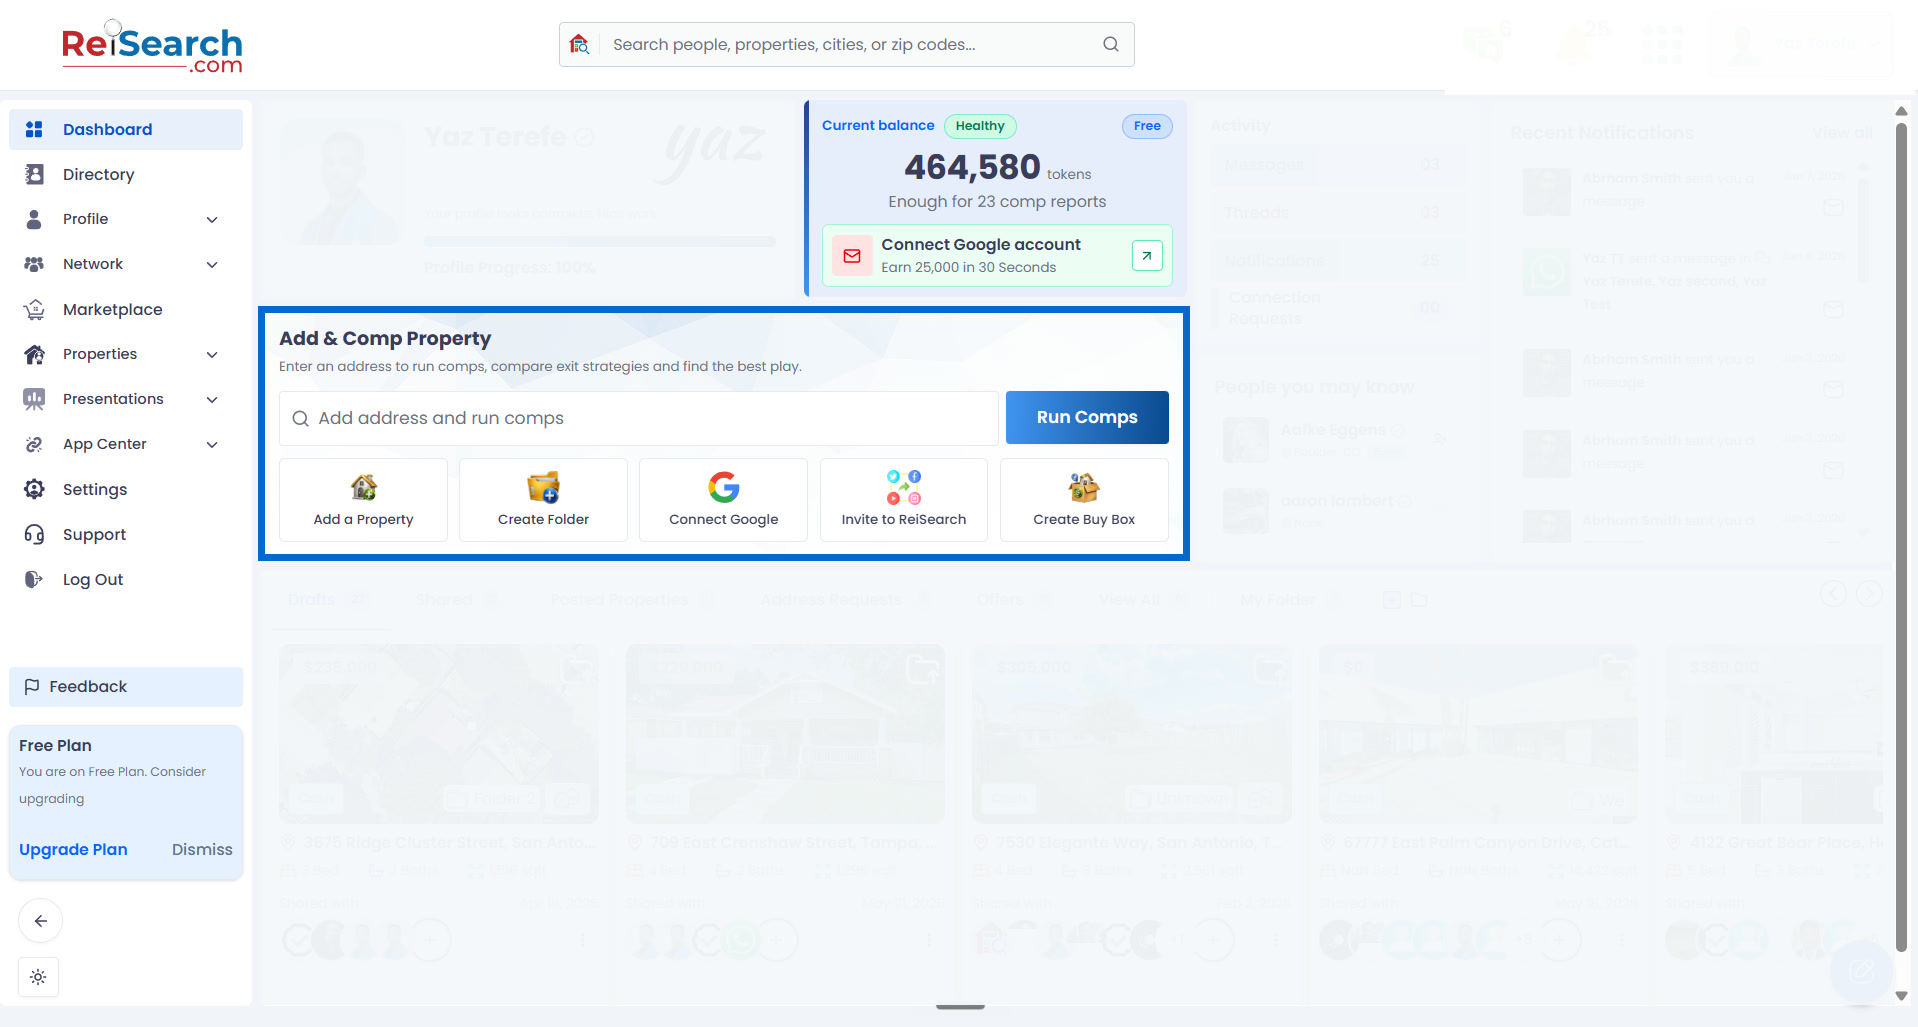
Choose this path when you want ReiSearch to create the record, gather the available property information and images, and begin the comp run as one workflow. Running comps can use additional credits.
Build the property without starting comps
- From the Dashboard, open Properties in the left navigation.
- Select Add Property.
- Confirm that the Add a Property page opens.
Navigation path: Dashboard → Properties → Add Property
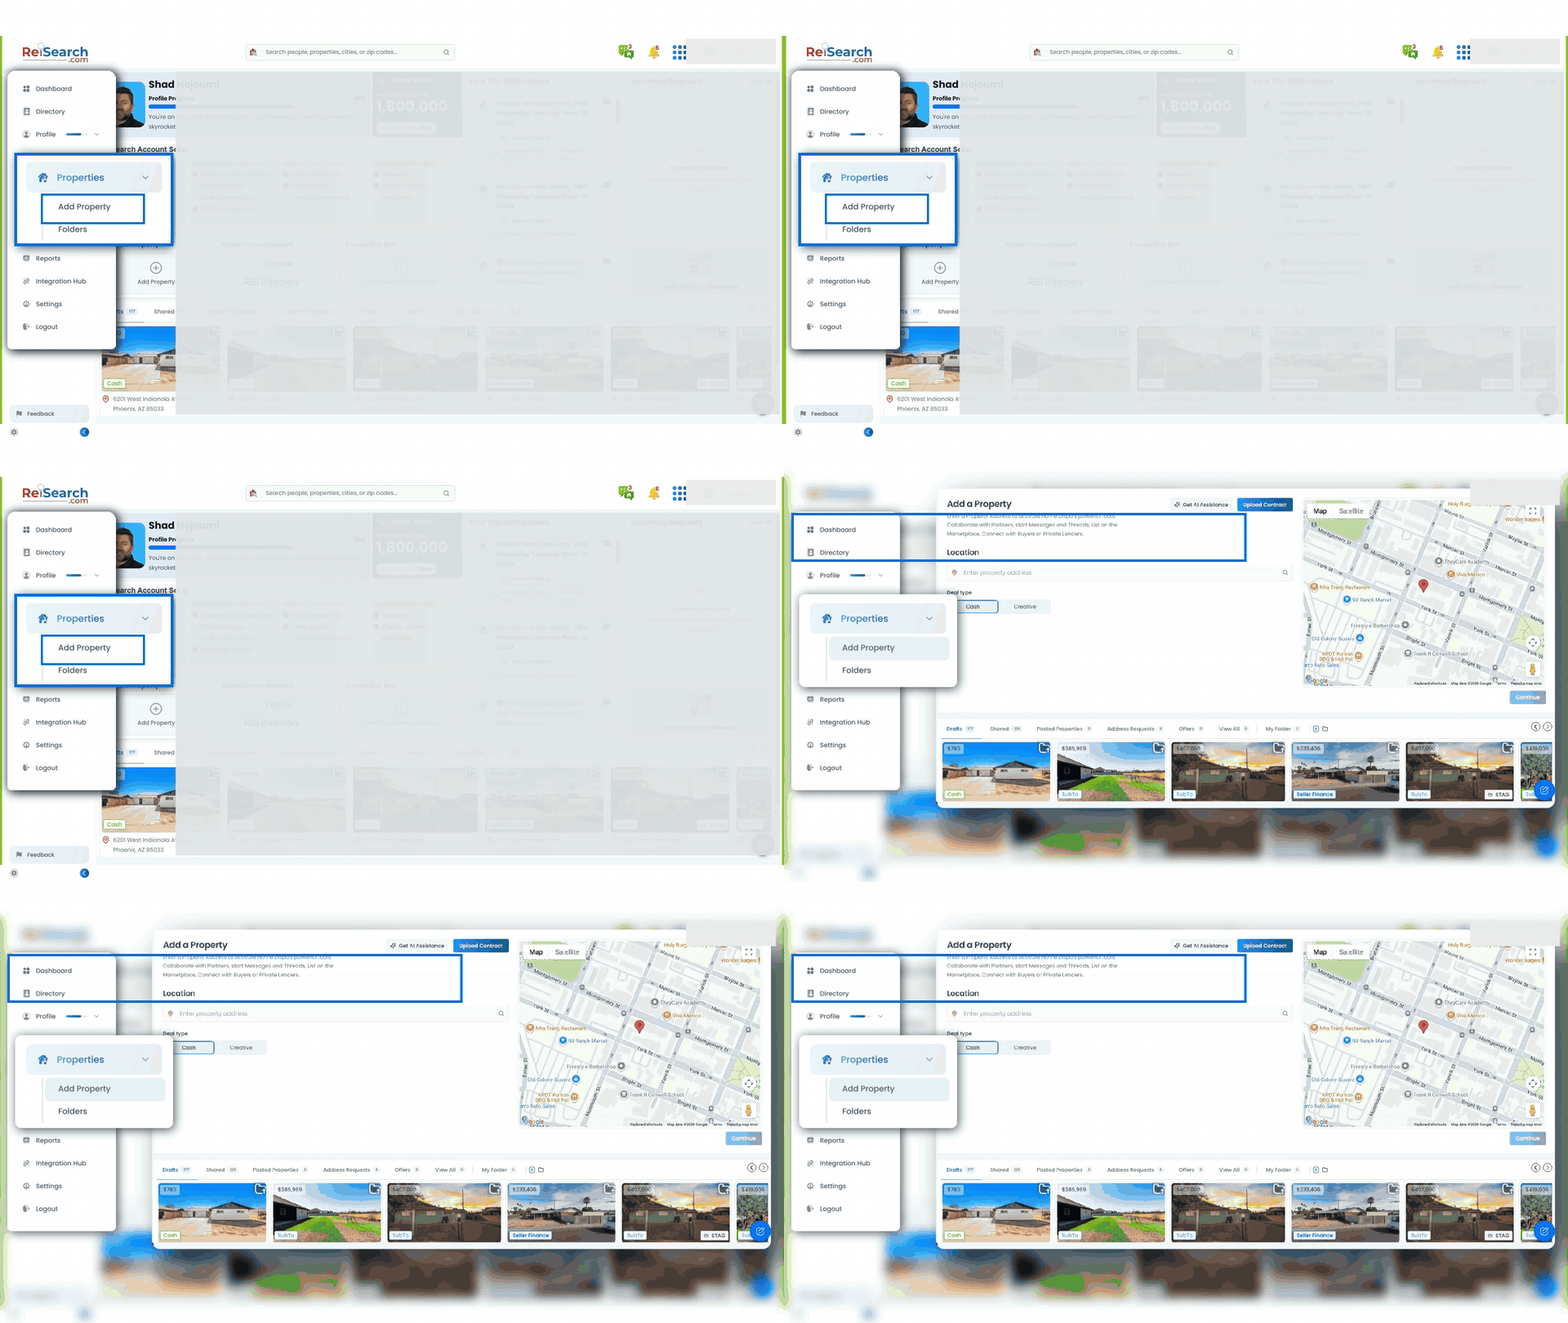
Both paths create a property workspace. Only Add & Comp Property automatically begins comparable-property analysis.
Give ReiSearch a verified subject property
For the manual Add Property path:
- Begin typing the complete address in Location.
- Wait for the standardized address suggestions.
- Select the matching suggestion rather than leaving free-typed text in the field.
- Check the address below the field and confirm the map pin.
- Choose the appropriate Cash or Creative deal type.
- Select Continue once.
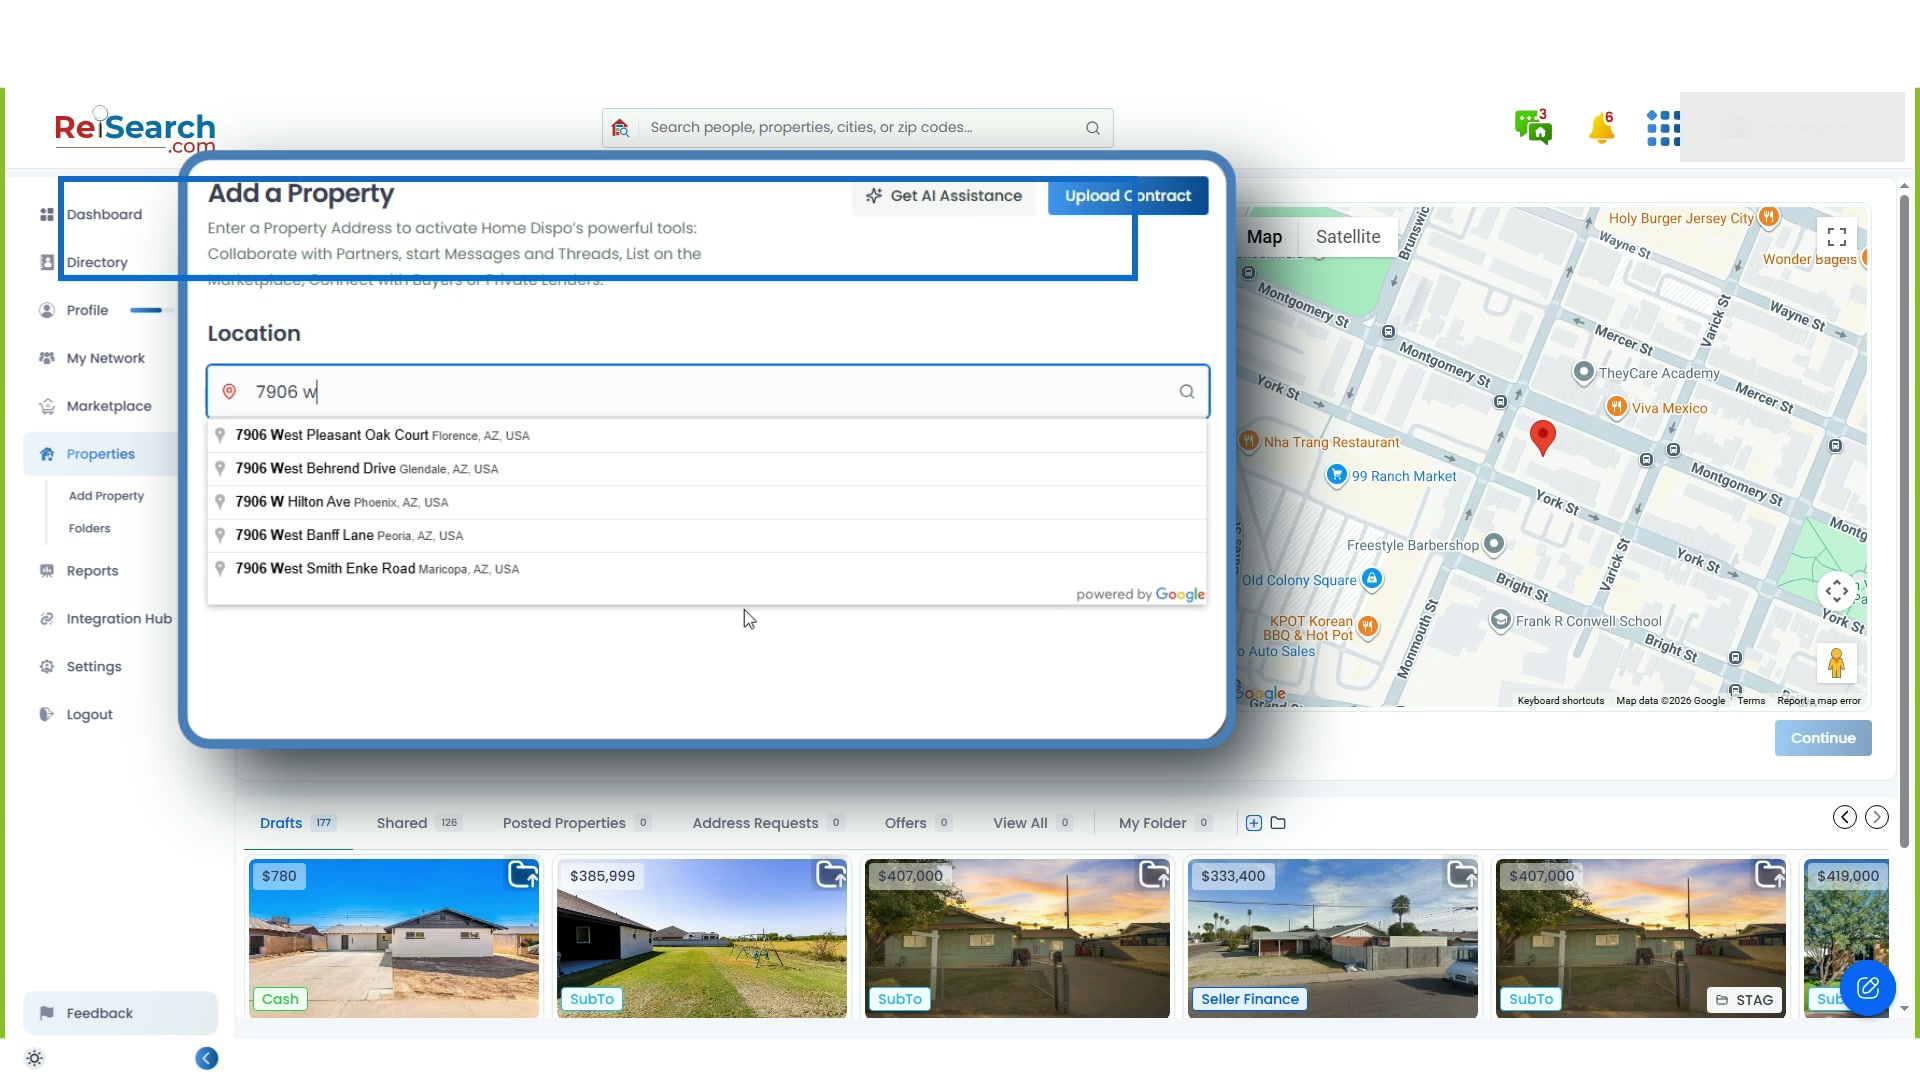
Selecting the suggested address gives the record the street, city, state, ZIP code, and coordinates needed for property research and mapping. The chosen deal type prepares the relevant Deal Structure fields inside the workspace.
What ReiSearch prepares automatically
After the property is created, ReiSearch retrieves the information available for the selected address and uses it to prepare the property workspace.
Depending on the property and available sources, the initial record can include:
- Property images
- Property type
- Year built
- Bedrooms and bathrooms
- Building area and lot size
- APN and legal-description information
- HOA information
- Available market-value estimates
- The standardized address, map location, and geographic details
- Deal Structure fields based on the selected Cash or Creative workflow
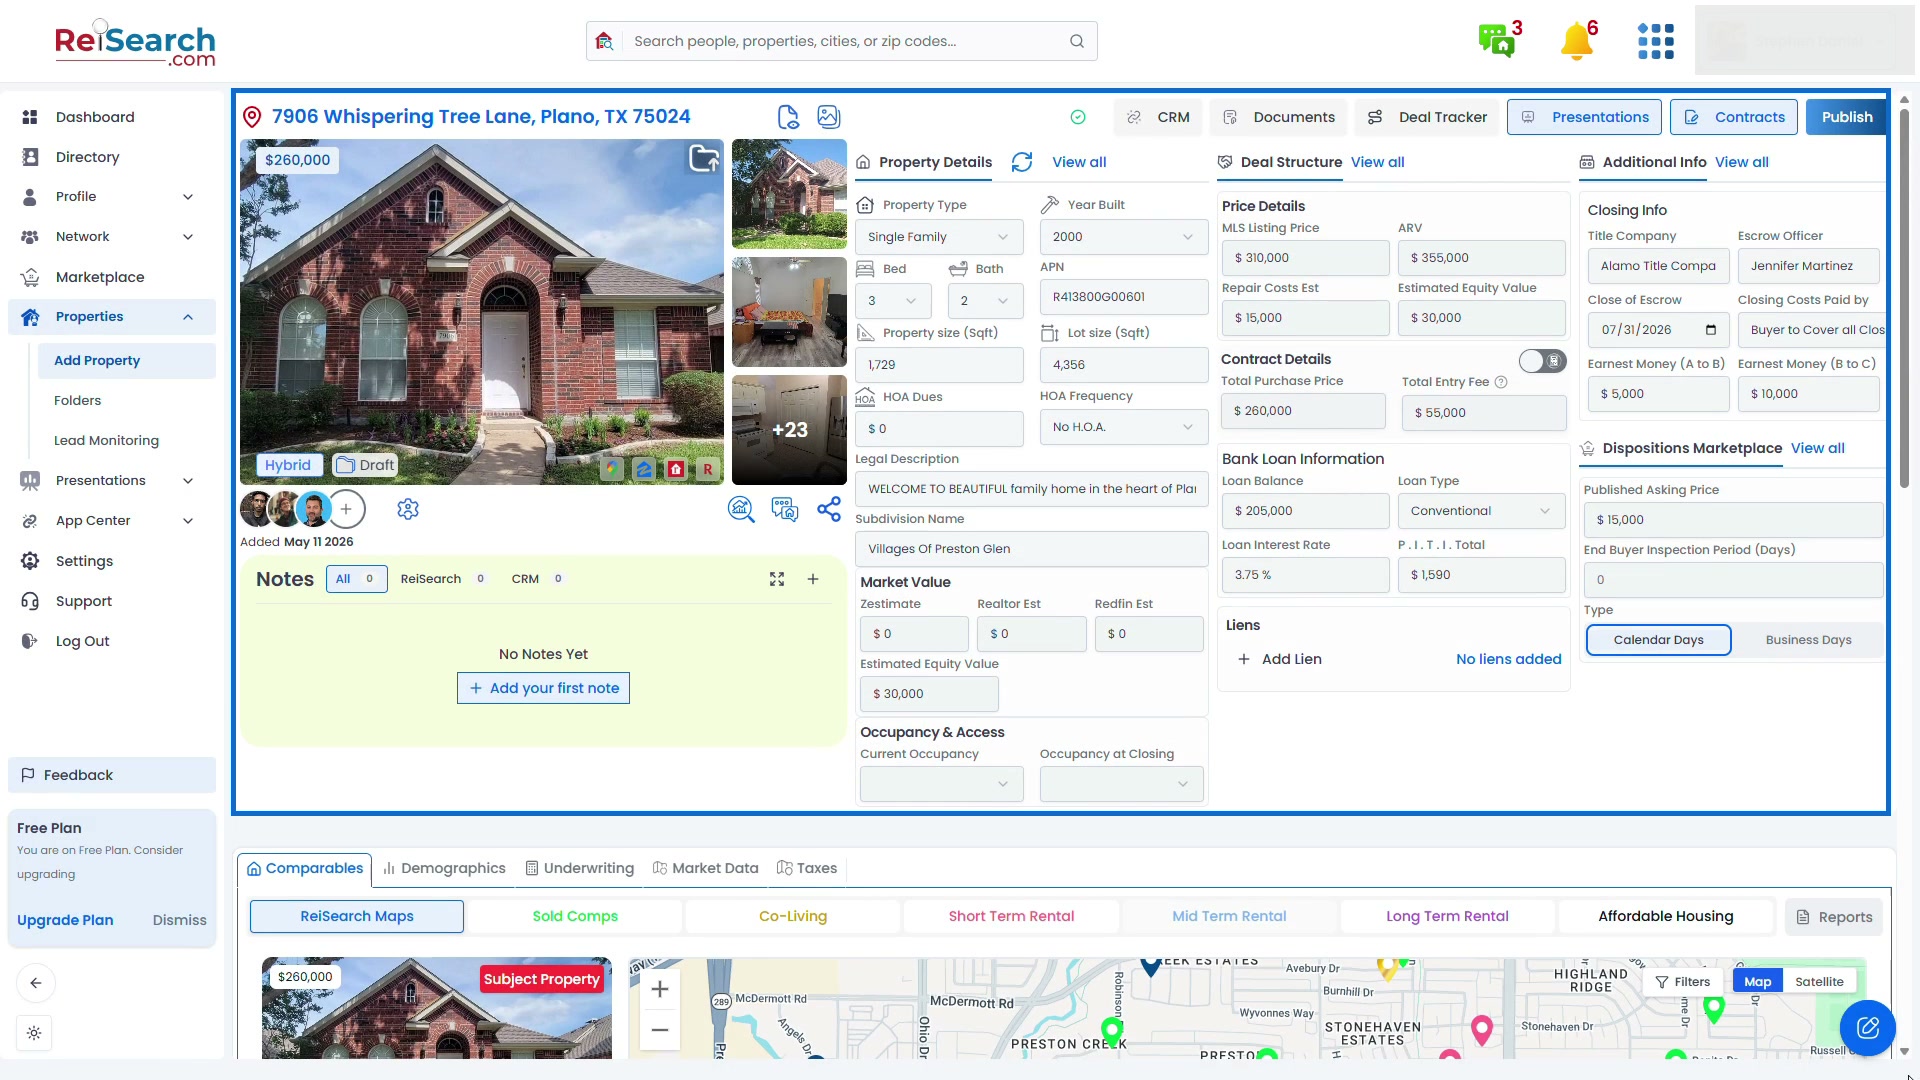
The completed record is not only a saved address. It becomes the shared workspace for comps, underwriting, market research, taxes, notes, documents, presentations, collaboration, and available dispositions workflows.
What Add & Comp does in addition
When the property is created through Add & Comp Property, ReiSearch also submits a comp-analysis request for the new subject property.
The comp run can move through queued, running, completed, failed, or cancelled states. Property enrichment and comping are related, but they are not the same operation:
- The property record stores the subject property and the work connected to it.
- The comp run searches for and ranks comparable properties using the selected analysis strategy and controls.
If you used Properties → Add Property, you can begin this analysis later from the Comparables area. Follow Run Your First Real Estate Comp when you are ready.
Verify the record before using it
Automatic retrieval reduces data-entry work, but source coverage and accuracy vary. Review material information before using the property for underwriting, offers, presentations, or distribution.
Check these areas first:
- Address and map: Confirm that the record is for the intended property.
- Images: Make sure the gallery belongs to the subject property and does not contain irrelevant media.
- Property Details: Review property type, beds, baths, year built, building area, lot size, APN, HOA, and legal information.
- Deal Structure: Add the actual price, repairs, financing, contract, lien, and other deal-specific information you know.
- Additional Info: Add access, closing, occupancy, and walk-through information when relevant.
An empty field does not mean the value is zero or that the property lacks that characteristic. It can mean the source did not provide the information. Add a verified value when you have a more authoritative source.
Continue from the completed property record
After reviewing the automatically prepared record, you can:
- Use the complete Property Workspace
- Run or review comparable-property analysis
- Create a property presentation
- Add collaborators and confirm their permissions
- Organize notes, documents, contracts, and deal information around the property
For the public overview of this workflow, see Property Research and Real Estate Deal Workspace.
If something does not work
- Continue is disabled: Select a complete address from the suggestion list. Free-typed text alone does not create the verified location.
- The wrong property or map pin appears: Clear the address and select the correct standardized suggestion.
- Some fields or images are missing: The available source may not contain them. Add verified information manually in the property workspace.
- A token warning appears: Review the account balance or plan before retrying.
- You expected comps but none started: Confirm that you used Add & Comp Property. The Properties → Add Property path intentionally creates the record without automatically running comps.
- The request remains in progress: Do not submit the same property repeatedly. Wait briefly, then review the Properties list before trying again.