
The editor combines a slide canvas with property-backed content, presentation controls, and layout tools. Start by confirming which property the deck belongs to and whether you own the presentation you are editing.
Understand the editor regions
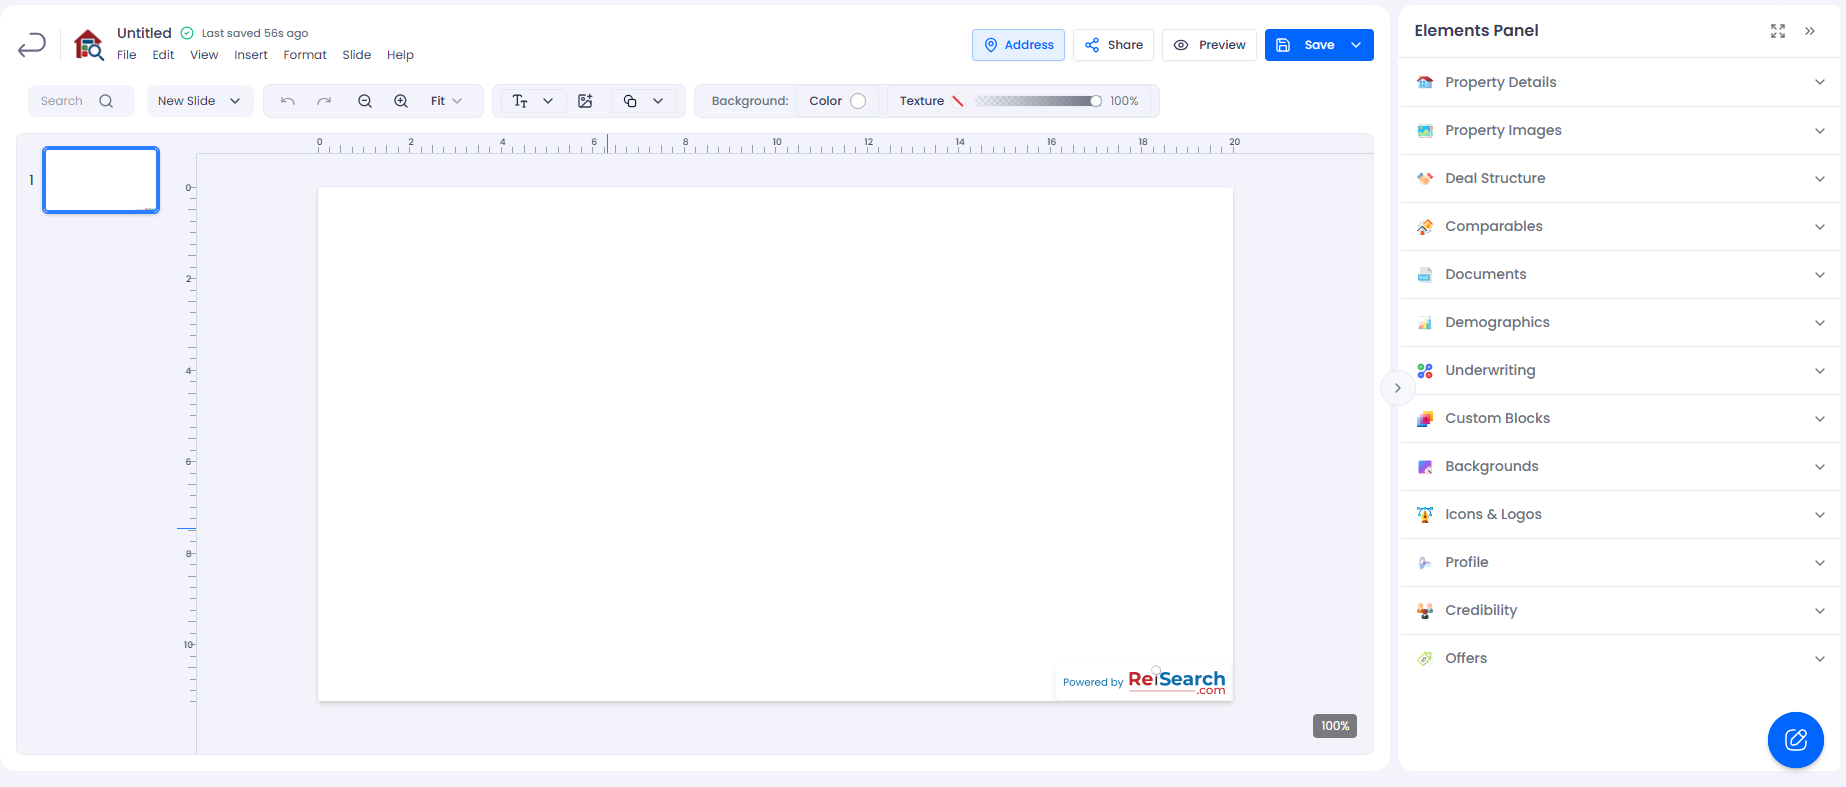
| Region | Use it for |
|---|---|
| Header | Presentation name, save status, address setting, Share, Preview, and Save |
| Slide sidebar | Select, add, reorder, duplicate, export, or delete slides |
| Menu and toolbar | Insert content and format the current selection |
| Canvas | Place and edit the current slide’s content |
| Elements panel | Drag property data, photos, deal blocks, comps, documents, charts, and other available items onto a slide |
| Format Options | Adjust the selected element’s size, position, arrangement, and available effects |
The Elements panel and Format Options serve different purposes. The first supplies content; the second changes content you have selected.
Start with the property and the story
Review the linked property’s record before building slides. Property characteristics, deal terms, comp selections, and renovation data can affect the available panel content.
For a cover slide, use Property Images, a short title, and company branding. For evidence slides, use the appropriate data panel rather than retyping every figure. Follow the complete presentation walkthrough for a suggested slide sequence.
Work with slides
Choose New Slide to insert a Blank Slide or open From Slide Library. Select a thumbnail to work on that slide. Use the slide’s menu for the available actions, including duplicate, insert below, export, delete, and slide-template saving where offered.
Duplicate a useful layout when the next slide needs a similar structure. Check the copied text, images, and bindings afterward; duplication does not verify the new slide’s content.
Work with elements
Select an element before formatting it. Double-click text to edit its contents. Use the available text toolbar for style changes, or Format Options for size and arrangement.
Composed blocks may contain several child elements. Keep a comp card or before/after pair grouped while moving it. Use Undo or Redo if a layout action produces an unintended result.
For detailed instructions, see arrange, group, and brand slides and linked fields and formulas.
Save and interpret the status
The current editor supports background saving for eligible edits to a presentation you own. Use Save → Save Presentation at important stopping points as well, and wait for image uploads and the saved status before leaving.
| Status | What to do |
|---|---|
| Unsaved changes | Save deliberately or allow eligible background saving to complete |
| Saving… | Wait for completion before closing or refreshing |
| Last saved… | The editor reports a completed save; still inspect the intended content |
| Save failed | Keep the editor open, check the connection and retry; do not assume changes persisted |
| Read-only source - changes not saved | You cannot save these changes to someone else’s original |
When viewing another user’s presentation, use an available Save as Template workflow to create your own copy. Being able to select an element is not the same as having permission to save the original.
Preview before distributing
Use Preview to inspect the slide order and resolved content. Check long headings, comp cards, photos, chart labels, address visibility, and contact details. Wait for property data to finish loading before export.
Then choose a share link or file export. A public view and a downloaded file are separate outputs, so inspect the one your audience will actually receive.